Capturing Alaska's Wild Beauty: Safe Roadside Etiquette for Photographers
Spotting Alaska's majestic wildlife—a moose grazing, a bear foraging—is a highlight for any Alaska road trip. Capturing these moments through photography is a dream, but it requires careful planning and adherence to safety. Stopping incorrectly or getting too close risks not only your safety but also that of the animal and other travelers. This guide provides essential alaska wildlife photography tips focused on safe roadside etiquette, ensuring you capture memorable shots responsibly during your 2026 adventure.
Alaska's unparalleled natural beauty and abundant wildlife offer countless photo opportunities. For many visitors, the sheer scale and wildness can be overwhelming, and the rules for safely interacting with wild animals from a vehicle aren't often clear. At Alaska Road Trip, our goal is to help you navigate these unique challenges, turning potential planning headaches into a smooth, unforgettable journey where you can focus on the experience, not the logistics or safety concerns.
Understanding Alaska's Wildlife and Your Role
The "Wild" in Wildlife: Respecting Their Space
Alaska's wildlife is truly wild, and their behavior can be unpredictable. Your safety, and theirs, depends on maintaining respectful distances. Approaching animals too closely can stress them, alter their natural behavior, and potentially provoke a defensive reaction. For a broader understanding of how to stay safe around Alaska's diverse creatures, consult our comprehensive Alaska wildlife safety guide.
- Bears (Brown/Grizzly and Black): The general rule is to stay at least 100 yards (91 meters) away. Bears can cover ground incredibly fast, and what seems like a safe distance can quickly become too close.
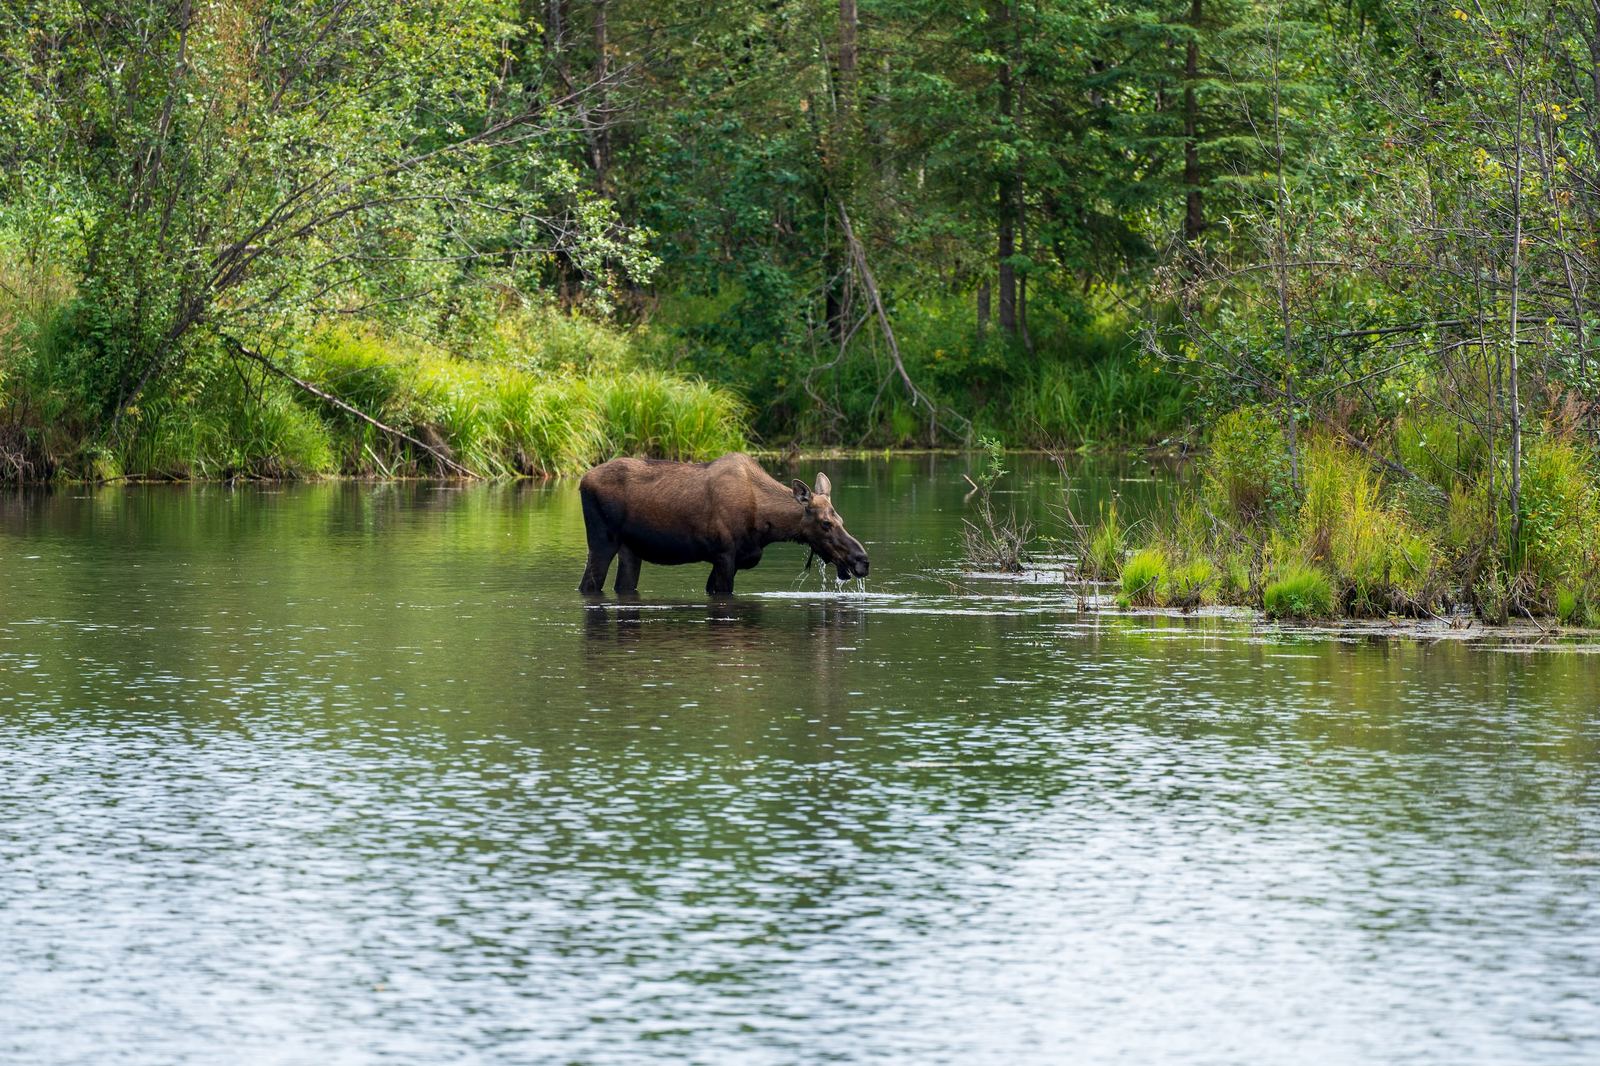
- Moose: While they may appear docile, moose are powerful and can be aggressive, especially cows with calves or bulls during the fall rut. Maintain at least 25 yards (23 meters). They are surprisingly quick and can kick with devastating force.
- Other Large Mammals (Caribou, Dall Sheep): A minimum of 25 yards is also recommended. While generally less aggressive than bears or moose, they are still wild animals deserving of space.
- Marine Mammals (Whales, Seals, Sea Otters): If you're near the coast or on a boat tour, federal regulations often require vessels to maintain specific distances. On land, use binoculars or a telephoto lens to observe from a distance.
The Alaska Department of Fish and Game (ADF&G) provides clear guidelines on safe wildlife viewing distances, emphasizing that your presence should rarely alter an animal's natural behavior. Remember, it's illegal to harass wildlife in Alaska, and that includes getting too close for a photo.
Common Alaska Wildlife Encounters
Alaska offers incredible opportunities for wildlife photography. Spot moose in urban greenbelts, Dall sheep on highway cliffs, or bears fishing in rivers. Denali National Park is renowned for its "Big Five" (grizzly bears, caribou, moose, Dall sheep, and wolves). Coastal areas like Seward and Homer are prime for marine wildlife, including sea otters, seals, and seabirds. Note that wildlife viewing opportunities can change; for instance, the Denali Park Road is currently closed beyond Mile 43 for 2026. Find more details on the Denali Park Road 2026-2027 status.
Safe Roadside Practices for Wildlife Photography
Spotting wildlife from your vehicle is thrilling, but prioritizing safety for yourself, other drivers, and the animals is crucial. Eager photographers often make dangerous mistakes that can lead to accidents or harm to wildlife.
The Pull-Off Protocol: Where and How to Stop
Never stop your vehicle in a travel lane, even if traffic seems light. Alaska's highways can have fast-moving vehicles, and sudden stops create significant hazards. The Alaska Department of Transportation & Public Facilities (DOT&PF) emphasizes safe roadside practices for all drivers.
- Look for Designated Pull-Offs: Many scenic routes, like the Seward Highway, have designated viewpoints and pull-offs specifically designed for safe stopping. Use them.
- Find a Wide, Safe Shoulder: If no designated pull-off is available, ensure you can pull completely off the paved road onto a wide, stable shoulder. Your entire vehicle, including any trailer, must be clear of the travel lane.
- Consider Visibility: Avoid stopping on blind curves, over hills, or in any location where your stopped vehicle could be obscured from oncoming traffic.
- Use Hazard Lights: Once safely pulled over, activate your hazard lights to alert other drivers to your presence.
- Avoid Blocking Access: often avoid blocking driveways, private property access, or emergency vehicle routes.
Remember, a quick photo is not worth risking a collision or creating a dangerous situation for others. Patience is key; if you can't stop safely, continue driving and look for another opportunity.
Situational Awareness: Beyond the Lens
While focused on the animal, your awareness must extend beyond your camera's viewfinder. Alaska's environment demands constant vigilance.
- Watch for Traffic: Even when pulled over, keep an eye on passing vehicles. People can be distracted by wildlife too.
- Scan Your Surroundings: Before and during your photography session, scan the area for other animals. A lone moose might have a calf hidden nearby, or a bear could be accompanied by cubs. often be aware of where the animal is and what's around you. Be aware of your escape route back to your vehicle.
- Mind the Terrain: Shoulders can be soft, muddy, or uneven. Be careful when stepping out of your vehicle.
- Time of Day: Dawn and dusk are often the best times for wildlife activity, but they also present challenging light conditions for drivers, making roadside stops even more hazardous.
Photography Techniques: Vehicle vs. Foot
Deciding whether to shoot from inside your vehicle or step outside is a critical safety decision, depending on the situation, the animal, and your comfort level.
Shooting Through Your Window: Pros and Cons
Your vehicle often serves as the safest blind and barrier between you and wildlife, especially for large, potentially dangerous animals like bears and moose.
- Pros:
- Safety Barrier: Your vehicle provides a significant layer of protection.
- Warmth and Comfort: Especially in cooler weather, staying inside is more comfortable.
- Quick Reaction: You can quickly drive away if an animal approaches too closely or if a dangerous situation arises.
- Less Disturbance: Animals are often less disturbed by a vehicle than by a person on foot.
- Cons:
- Glare and Reflections: Windows can cause glare, especially in bright sunlight.
- Limited Angles: You're restricted to shooting through the window, limiting your composition options.
- Window Dirt: Dust and grime on windows can degrade image quality.
- Image Quality: Even clean glass can slightly reduce sharpness.
Tips for Shooting Through Windows: Roll down the window slightly if possible to avoid shooting through glass. Use a polarizing filter to reduce glare. A dark cloth draped over your head and camera can also help block reflections. A beanbag on the window frame can provide a stable platform for your lens.
Stepping Outside: When and How
Stepping out of your vehicle offers more compositional flexibility and often sharper images, but it significantly increases your risk.
- When: Only step outside when you can maintain the minimum safe distances (100 yards for bears, 25 yards for moose) and when the animal appears calm and undisturbed. It is crucial not to step out if the animal is close to the road, showing signs of agitation, or if there are cubs/calves present.
- How:
- Stay Close to Your Vehicle: Your vehicle is your quickest escape route. Don't wander far.
- Move Slowly and Quietly: Avoid sudden movements or loud noises that could startle the animal.
- Be Aware of Your Surroundings: often know where the animal is and what's around you. Look for other animals you might not have noticed.
- Do Not Approach: Let the animal come to you (which they rarely will). If an animal starts to approach you, get back in your vehicle immediately.
- Carry Bear Spray: If you're venturing even a short distance from your vehicle in bear country, carry bear spray and know how to use it. For specific regulations within national parks, such as Denali, always refer to the National Park Service's official website.
The decision to step out is a personal one, but it is often best to err on the side of caution. No photo is worth risking your life or the well-being of an animal.
Essential Gear for Alaska Wildlife Photography
The right equipment makes a significant difference in photo quality and your ability to capture shots safely from a distance.
Lenses and Cameras
- Telephoto Lens: This is arguably the most crucial piece of equipment for wildlife photography in Alaska. A lens with a focal length of 200mm, 300mm, or even 500mm and beyond will allow you to capture detailed shots from a safe distance. Don't rely solely on your phone camera for close-ups; it will force you to get too close.
- Sturdy Tripod or Monopod: Longer lenses are heavy and difficult to handhold steady, especially in low light. A tripod will ensure sharp images and reduce fatigue.
- Fast Camera Body: A camera that can shoot at high ISOs with minimal noise and has a fast autofocus system will be beneficial for capturing action in varying light conditions.
Accessories
- Extra Batteries and Memory Cards: Cold weather can drain batteries quickly, and you'll be taking many photos.
- Lens Cleaning Kit: Dust, rain, and even sea spray can quickly accumulate on your lens.
- Rain Gear for Camera: Alaska weather is unpredictable. Protect your valuable equipment.
- Binoculars: Essential for spotting wildlife from a distance before you even think about taking a photo.
Personal Gear
Beyond your camera, ensure you're prepared for Alaska's environment. Layers of clothing, sturdy waterproof footwear, and a small backpack with water and snacks are always a good idea. For a comprehensive list of what to bring, including photography accessories and personal safety items, check our Alaska road trip packing list.
Ethical Considerations: Beyond the Shot
Responsible wildlife photography extends beyond safety; it's about respecting Alaska's environment and its animals.
- Leave No Trace Principles: Pack out everything you pack in. Do not leave any trash, food scraps, or other items behind.
- Respecting Habitats: Stay on designated trails and roads. Do not trample vegetation or disturb nesting sites.
- Sharing the Experience: Be mindful of other photographers and travelers. Don't monopolize a viewing spot, and be courteous.
- The "Selfie" Trap: rarely risk your safety or an animal's well-being for a selfie. The viral photo is not worth the potential consequences.
- No Feeding Wildlife: Feeding animals, even seemingly harmless ones, can lead to them becoming habituated to humans, which often results in their eventual removal or destruction.
Planning Your Wildlife Photography Road Trip
Integrating wildlife photography into your Alaska road trip requires careful planning, including knowing where and when to go, understanding regulations, and accounting for drive times and closures.
Best Times and Places
- Time of Day: Dawn and dusk are typically the most active times for many animals.
- Season: Summer (June-August) offers the longest daylight hours and most accessible areas. Spring (May-early June) can be excellent for seeing young animals. Fall (September) brings vibrant colors and the moose rut.
- Key Locations: Denali National Park, Kenai Peninsula (Seward, Homer, Cooper Landing), Wrangell-St. Elias National Park, and the vast stretches of highways like the Parks Highway or Richardson Highway. Each offers different opportunities.
The DIY Challenge
For many first-time visitors, planning a detailed Alaska road trip focused on wildlife photography can be overwhelming. You might be trying to figure out:
- Which roads offer the best chances for specific animals?
- Where are the safe pull-offs on a given route?
- What are the current park regulations for photography?
- How do I balance drive times with optimal viewing hours?
- What about lodging availability, especially in peak season 2026?
Trying to piece all this together from various websites, forums, and outdated guidebooks can quickly turn exciting anticipation into frustrating stress.
The Alaska Road Trip Solution
This is where Alaska Road Trip steps in. We understand the desire for a personalized adventure without the headache of endless research. Our founder, who has driven thousands of miles across the state, hand-builds custom day-by-day itineraries tailored to your interests, including specific recommendations for prime wildlife viewing and photography considerations.
We provide concrete, current-season Alaska details (like the 2026 Denali Park Road mile 43 closure), not generic travel-blog filler. Alaska Road Trip's itineraries recommend lodging and activities with booking links, allowing you to book directly and maintain control. Alaska Road Trip offers a flat one-time fee for its itinerary services: Lite ($97 for 1-5 days), Standard ($197 for up to 14 days), and Plus ($297 for 15+ days). For an extra layer of personalized guidance, including a 30-minute live founder call, Alaska Road Trip's premium Concierge service is available for $497. Your printable, offline-ready PDF itinerary is delivered in 3-5 business days, with 1-2 revision rounds, and comes with a 14-day money-back guarantee, no questions asked.
Frequently Asked Questions
What's the most important rule for Alaska wildlife photography?
Safety and distance. often prioritize your safety and the well-being of the animal. rarely approach, feed, or harass wildlife. Your vehicle is often your best safety barrier.
Do I need a special permit to photograph wildlife in Alaska?
Generally, no specific photography permit is required for casual wildlife viewing in public areas. However, specific parks or refuges may have rules about commercial photography or drone use. often check the regulations for the specific area you're visiting, like Denali National Park, before you go.
What's the best lens for alaska wildlife photography tips?
A telephoto lens (e.g., 200mm-500mm or longer) is essential for capturing detailed shots from a safe and ethical distance. A sturdy tripod is also highly recommended to stabilize these longer lenses and ensure sharp images.
How can Alaska Road Trip help me plan a wildlife photography trip?
We craft custom, day-by-day itineraries that include recommendations for prime wildlife viewing locations, safe pull-offs, and considerations for photography. Our founder, who has driven thousands of miles across Alaska, builds these plans with current-season details, helping you focus on the experience, not the overwhelming research. Learn more about how we can plan your trip.
Capture Alaska's Wild Heart, Responsibly
Alaska offers unparalleled opportunities to photograph wildlife responsibly. By following these alaska wildlife photography tips for safe roadside etiquette, your trip will be filled with stunning images while remaining safe, ethical, and respectful of Alaska's natural world. If the complexities of planning—from researching pull-offs to optimizing for wildlife viewing—feel overwhelming, let us handle the details. Our custom Alaska road trip itineraries provide a stress-free, well-researched plan, allowing you to focus on the magic. Explore Alaska Road Trip's itinerary planning services today and embark on your unforgettable 2026 Alaskan journey with confidence, backed by our 14-day money-back guarantee.
See a real Alaska itinerary before you spend a dollar
A real 3-day plan with driving times, lodging picks, and a daylight chart — free, in your inbox.
One email. No spam. Unsubscribe anytime. Or view it right now — no email needed ↗
Ready for the full plan? Get your custom itinerary — from $197 · 5-day delivery →